Showing posts with label cake. Show all posts

Saturday, February 14, 2015

Valentine's Day Strawberry Upside Down Cake


Happy Valentine’s Day!! Tis the season to remind the ones you love why you love them, how you love them, and generally just how lovely they really are. It doesn’t hurt to show that love with a strawberry upside down cake!
Ingredients:

Whip cream:
½ Tablespoon vanilla extract
1 cup heavy whipping cream

Topping:
2 teaspoons cinnamon
 ½ stick of unsalted butter
½ cup brown sugar
2 cups strawberries

Cake:
Pinch of cinnamon
3 cups flour
1 Tablespoon baking powder
½ teaspoon salt
1 ½ cups sugar
4 eggs room temp
1 Tablespoon vanilla extract
¾ cup heavy cream
2 sticks room temp butter


Preheat oven to 350 degrees.
 
Start by slicing the strawberries and measuring out all of your ingredients.
Make the cake first. In a medium sized bowl whisk together flour, baking powder, salt, and cinnamon.
In a separate large bowl beat the two sticks of butter and sugar until light and fluffy. Beat in the eggs one at a time, then beat in vanilla.
In a small bowl mix together ½ cup water and the cream. Start mixing it all together by beating the flour in thirds, and adding the cream mix in between.  Set the batter aside.
Spray down your loaf cake or butter it in preparation of pouring batter in. To lay down the topping for the cake, melt down ½ stick of butter, ½ a cup of sugar, and the cinnamon until the sugar melts.
Pour at the bottom of the loaf pan. Lay the strawberries down creating two layers if possible to ensure maximum juiciness! Next spoon the batter on top.
Place in oven and bake for 50 minutes, and turn half way through. Check to see if baked through about 40 minutes in.
In the meantime, make your whip cream by beating the remainder of your whipping cream and vanilla extract on high speed until it forms peaks.
Serve warm to the ones you love!
Happy Valentine’s Day!
                                                                    

Thursday, December 25, 2014

Christmas Melting Snow Cake


Merry Christmas! We hope that you are having a wonderful holiday season. No matter what holiday you celebrate, this is a cake that can be celeb rated and enjoyed by all, enjoy our Melting Snow Cake. This is a spiced pound cake with a marshmallow fluff layer on the outside. This cake doesn’t get its name for any reason….it is a small cake, but is messy cake to make, so beware. If you are not feeling the messy frosting, and want something more prim looking feel free to buy a can of frosting and mixing our marshmallow fluff in with it!
Enjoy!

Ingredients: Serves about 4-6

Marshmallow Fluff:
3 egg whites room temperature
2 cups corn syrup
2 cups powdered sugar
1 teaspoon vanilla extract

Cake:
1 cup (2 sticks) unsalted butter, room temperature, plus more for pan 
 2 cups all-purpose flour (spooned and leveled), plus more for pan 
 1 cup sugar 
 4 large eggs 
 2 teaspoons pure vanilla extract 
 1/2 teaspoon salt
1.5 teaspoon ground ginger
1.5 teaspoon ground clove
1.5 teaspoon cinnamon


Start by making the marshmallow fluff and preheating the oven to 350 degrees.  Pour corn syrup into the egg whites, and beat on a high speed with an electric mixer until the mixture doubles, about 5-6 minutes.  Slowly add in your powdered sugar while mixing on low. Once completely mixed, add vanilla extract. Place in fridge until ready to use.
Butter your cake pans. We used two 8 inch round pans.  Using an electric mixer on high speed, beat butter and sugar until light and fluffy. Add eggs one at a time, beating well after each addition then add vanilla and salt.

With mixer on low, gradually add flour, and all of your spices, beating just until combined.

Bake until a toothpick inserted in center of cake comes out clean, about 35 minutes.

Let cool completely before you start to put the cake together. If the top of the cake is too rounded you can simply take a knife to flatten the tops off. Start by putting a layer of fluff in between the two cakes, if you are afraid of your cake sliding, then secure with toothpicks. Place second cake on top. Cover in fluff. When we made it the fluff poured all down the side because it is so heavy, so we placed in the freezer immediately for about 5 minutes.

Don’t leave in freezer for longer than 15 minutes, because it will be difficult to eat! Before serving dust with powdered sugar!

Tada!

Merry Christmas!


Sunday, May 26, 2013

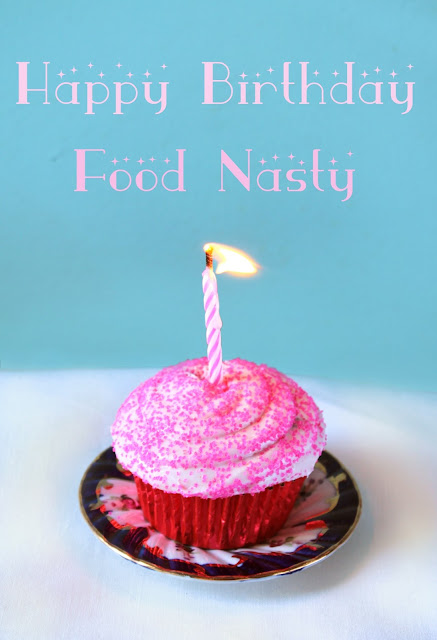
Happy Birthday Food Nasty: cupcakes!


We have officially had a year since our first post! So this is Food Nasty’s 1st Birthday!

 A lot has happened this year, many great and fun things, and we are happy that you have been a part of it! We hope to grow even more and share many more things with you in our second year!

So enjoy these birthday cupcakes we have made for you after you get a look at some of Food Nasty's best recipes of our first year!

 Happy Birthday Food Nasty!
Going clockwise and starting top left:
1. Low Calorie Breakfast Sandwich
2. Rainy Day Chipotle, Chorizo, and Beef Chili!
3. Heat Wave Popsicles
4. Cinnamon Crumble Apple Muffin
5. Detox Slaw
6. Meyer Lemon Cake with Coconut Frosting
Cinnamon Cupcakes with Raspberry Buttercream


Ingredients: makes 12
1 1/2 cups all-purpose flour (spooned and leveled)
1 1/2 teaspoons baking powder
1/2 teaspoon salt                                      
1/2 cup milk
1 teaspoon pure vanilla extract
1/2 cup (1 stick) unsalted butter, room temperature
3/4 cup sugar
2 large eggs
2 teaspoon ground cinnamon

Frosting:
8 oz cream cheese
1/2 cup raspberry jam (seedless)
1/2 cup butter
2 cups powdered sugar

Preheat the oven to 350 degrees. Line your cupcake tray with cupcake liners.

In a medium bowl mix together flour, baking powder, cinnamon, and salt. In a small bowl place vanilla extract in milk.
In a large bowl cream together butter and sugar. Beat adding one egg at a time. Add half of the dry mix, and beat, then add milk, then finishing off with the rest of the dry mix. Do not over beat.

Using an ice cream scooper if you have one, and fill your cupcake liners 2/3 of the way up. Bake for 20-25 minutes, or until a toothpick is inserted and comes out clean.
Pull out and cool until they are cooled all the way through before you put frosting on.

To make frosting mix half the cream cheese and half the butter together with all of the sugar. Beat until mixed completely, add jam. Add the remainder of cream cheese and butter slowly as to not make runny frosting.
Set in fridge and cool for 20 minutes to let set.

If you don't have an actual piping bag, place frosting in sandwich bag, and cut tip off and pipe!
Enjoy these delicious food nasty birthday cupcakes!!!

Sunday, March 31, 2013

Meyer Lemon Cake with Coconut Frosting!

Happy Easter everyone!!! While Mikey was cooking brunch at the Sunny Spot, I spent the day baking! I will shortly be dyeing some late night eggs with my mother, and forcing my father to watch the millionth episode of Doctor Who. Easter is a moveable feast, not falling on a linked date on the calendar. Easter is the celebration of Christ resurrecting from death. It is at the end of lent, and falls after Good Friday, commemorating the crucifixion of Christ.

This Holy Day is remembered and celebrated through classic traditions through families sharing meals and attending church service, and through non-religious traditions such as fabulous mimosas, Easter baskets full of candy, we dye Easter eggs, eat peeps, and take kids to look at the Easter bunny.

I have always felt that Easter is the true beginning of Spring and I wanted to build a cake that captured the essence of spring, something light, fun, pretty, and not to mention delicious! Two flavors I love and feel that represent the Spring, and would be wonderful together, are Meyer lemon and coconut. This is why I have created a Meyer lemon layer cake iced with coconut frosting and coconut flakes.

*If you want your baking to be super duper accurate use a scale which you can set to zero to measure out equal parts for baking.

Ingredients:
Frosting:

1 14 oz can unsweetened coconut milk
1 cup unsalted butter
2 ½ cups powdered sugar
Cake:

16 tbsp. unsalted butter, softened, plus more for pans
2 1/2 cups cake flour, plus more for pans, sifted
2 1/2 tsp. baking powder
4 eggs
1 tsp. kosher salt
1/2 cup milk
1 tsp. vanilla extract
1 1/2 cups sugar
1 lemon’s zest


Star by preheating the oven to 350°. Butter and flour two 9″ cake pans, and set aside, leaving the 1 cup of butter out to soften. Get one small, medium, and large bow and put to the side.

In a medium bowl sift together your flour, baking powder, and salt, then set aside.

In a small bowl whisk together milk and vanilla in a bowl, set aside.

In a large bowl, cream butter, 1 1/2 cups sugar, and zest on medium-high speed until pale and fluffy, about 3 minutes. Add eggs, one at a time, beating well after each addition. On low speed, alternately add dry ingredients in 3 batches and wet ingredients in 2 batches. Increase speed to high and beat until batter is smooth, about 5 seconds.

Using your scale, pour out the batter so that it is equally divided between prepared pans, and smooth top with a rubber spatula, then drop pans lightly on a counter to get rid of any large air bubbles.

Place in oven on the same rack next to each other for about 40 minutes, or until a toothpick inserted in middle comes out clean. Let cakes cool for 20 minutes in pans, invert onto wire racks, and let cool.

While your cakes are cooling, you are going to prepare your reduced coconut milk. It is very simple, basically you are going to take a deep sauce pan and pour out your coconut milk, and heat on a medium high heat. The milk will come to a boil, and you will need to stir it while it reduces to a desired thickness, about 25 minutes. Pour out into a bowl, and chill.

Using an electric mixer, beat butter until smooth. Add sugar, once cooled down add a 1/3 of a cup of reduced coconut milk, and blend together a delicious frosting has been created.

Now start to prepare the cakes by cutting the rounded top of the cake off and discard. Next, using a ruler, mark halfway up the cake and using a serrated knife cut through to create two layers. To create the cake put one layer of cake down, then spread frosting, top with coconut flakes, then add next cake layer and continue. Frost all the surrounding parts of the cake and cover in coconut frosting.

To add the finishing touch, top the cake with either a peep or like we used a few malt balls that look like Easter eggs. Enjoy! Happy Easter!

Thursday, November 1, 2012

Happy Halloween


On the final night of Halloween Michael and I have made for you a devilishly delicious spiced black velvet cake oozing with a red strawberry cream cheese frosting. Make this if you dare, for you are doomed to eat the whole thing at once!!!

Ingredients:

Cake:
Vegetable oil for the pans
2 oz Black food coloring
2 1/2 cups all-purpose flour
1 1/2 cups sugar
1 teaspoon baking soda
1 teaspoon fine salt
½ teaspoon cinnamon
1 teaspoon cocoa powder
1 1/2 cups vegetable oil
1 cup buttermilk, at room temperature
2 large eggs, at room temperature
1 oz black gel food coloring
1 teaspoon white distilled vinegar
1 teaspoon vanilla extract

Frosting:
1 oz red food coloring
1 cup macerated strawberries
4 cups powdered sugar
1 cup butter
8 oz cream cheese
1 tsp vanilla extract


To start make your cream cheese frosting, because you want it to harden a bit in the refrigerator. We made two frostings, one to hold the cake together, and the other to create the eerie drips. In a large bowl whip together 2 cups of powdered sugar, ½ a cup of room temperature butter, 8 oz of cream cheese, 1 oz red food coloring, and 1 tsp vanilla extract. Now macerate your strawberries and add them to the frosting, this will make it soupy, and this will be the frosting you use to make the drips.

In another bowl, beat the rest of your butter and powdered sugar together, adding about a cup of the soupy frosting mix, to make a thick frosting you can use to hold the layers of cake together. Refrigerate and use after you bake the cakes.

In a large bowl, sift together the flour, sugar, baking soda, salt, spice, and cocoa powder. In another large bowl, whisk together the oil, buttermilk, eggs, food coloring, vinegar, and vanilla.

Using a hand mixer, mix the dry ingredients into the wet ingredients until just combined and a smooth batter is formed.

Divide the cake batter evenly among the prepared cake pans. Place the pans in the oven evenly spaced apart. Bake, rotating the pans halfway through the cooking, until the cake pulls away from the side of the pans, and a toothpick inserted in the center of the cakes comes out clean, about 30 minutes.

Remove the cakes from the oven and run a knife around the edges to loosen them from the sides of the pans. One at a time, invert the cakes onto a plate and then re-invert them onto a cooling rack, rounded-sides up. Let cool completely, if you don’t, even your stiff frosting will be runny.

To assemble the cake, us the cake layers as is, cake layers are rounded and usually you cut them to perfection, but we left them as is to create this morbid beast of a looking cake. So place the first layer on your plate or cake stand, cover the first cake layer with the stiff frosting, then dollop a large spoonful of soupy frosting and spread around letting some drip down the sides. Place the second cake layer on top, smooshing it down a bit to stay, and repeat. Once you have the final layer, really lay on top that soupy frosting to get that gory effect. This cake without fail will be the spookiest thing in the room with the harsh black cake up against the oozing red frosting!

Happy Halloween!!!

Monday, July 2, 2012

All American Fourth of July Cake


What is more awesome than feeling patriotic this time of year….We know, feeling patriotic through sweets! What we love about this cake is that it is so beautiful (as well as tasty), it almost transports you to feeling like you are sitting next to Marie Antoinette stuffing your faces with pastries. This cake is slightly rustic, and easy on the eyes, and the tongue.

Side note- We were lucky enough to pick and use blueberries from our own yard, so we highly suggest starting to grow your own!

Ingredients:
Cake:
12 tablespoons (1 1/2 sticks) unsalted butter, room temperature, plus more for pans
2 1/2 cups all-purpose flour (spooned and leveled), plus more for pans
1 tablespoon baking powder
1 teaspoon salt
3/4 cups sugar
2 large eggs, plus 3 large egg yolks (reserving whites for meringue, plus 1 additional white)
1 teaspoon pure vanilla extract
1 cup milk
Blue food coloring
1 cup blueberries (some set aside for decoration)

Frosting:
4 tablespoons unsalted butter, room temperature
4 cups confectioners' sugar, sifted
1/4 teaspoon pure vanilla extract
6 ounces cream cheese, room temperature
Red food coloring


Cake:
Preheat oven to 350 degrees. Take two 8 inch round cake pines, line the bottom with parchment paper, butter, it, and dust with flour. Sometimes I butter the pan before I put the parchment down so it sticks better. In a large bowl, whisk flour, baking powder and salt together and put aside.
In a separate large bowl, using an electric mixer beat butter (make sure it is soft, so leave out for a while before baking), with sugar until completely smooth. Add your eggs and your yolks one at a time while blending, once you finish adding the eggs, add the vanilla and blend. Now you alternate adding the flour and the milk, beginning and ending with the flour- a tip Francesca learned from her beloved Martha Stewart.

Fun part now is adding the food coloring, add as many drops as you need for the desired depth of color, and then fold the blueberries in with a spatula so you don’t break them.
Divide the batter in between both pans and bake for 25-30 minutes, or until you poke with a toothpick and it comes out clean. Once done baking let cool in the pan for ten minutes, then flip out of the pans onto cooling racks so they are upside down, and let completely cool.

Frosting:
Super easy frosting…just place all of the ingredients into a bowl and blend, and add food coloring until it is pink or red as you like.
Now assemble all the elements of the cake. Frost in between the two layers, and then all around. Don’t worry about all the frosting being perfect, some runny frosting will add some beautiful character. Add a dash of blueberries for character. Slice. Eat! Let them eat cake…in the name of the USA!